
Below, I describe in 10 easy steps how to create and format a new document.
If you want to keep things simple while writing and editing your document, use the formatting method I describe in A simple method for formatting Microsoft Word documents.
The following instructions are intended for users of Word 2007.
1. Open and save a new Word file
MS Word has a default document layout that you can easily adapt to create a layout that is clean and professional:
- Open Word and type Ctrl+N to open Word”s default blank document
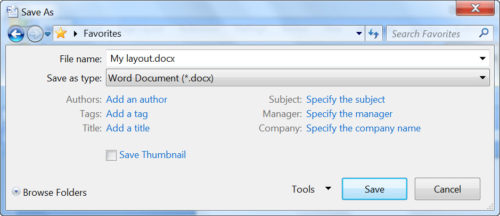
- Type Ctrl+S to save this blank document
- Save the document as ‘My layout.docx’ to a chosen location (e.g. Favorites) on your computer.
You now have created a new document in which to save your preferred layout.
2. Set the page margins
The first thing to do when starting a new document is to set parameters for the layout of your document.
To set the page margins, select the Page Layout ribbon and:
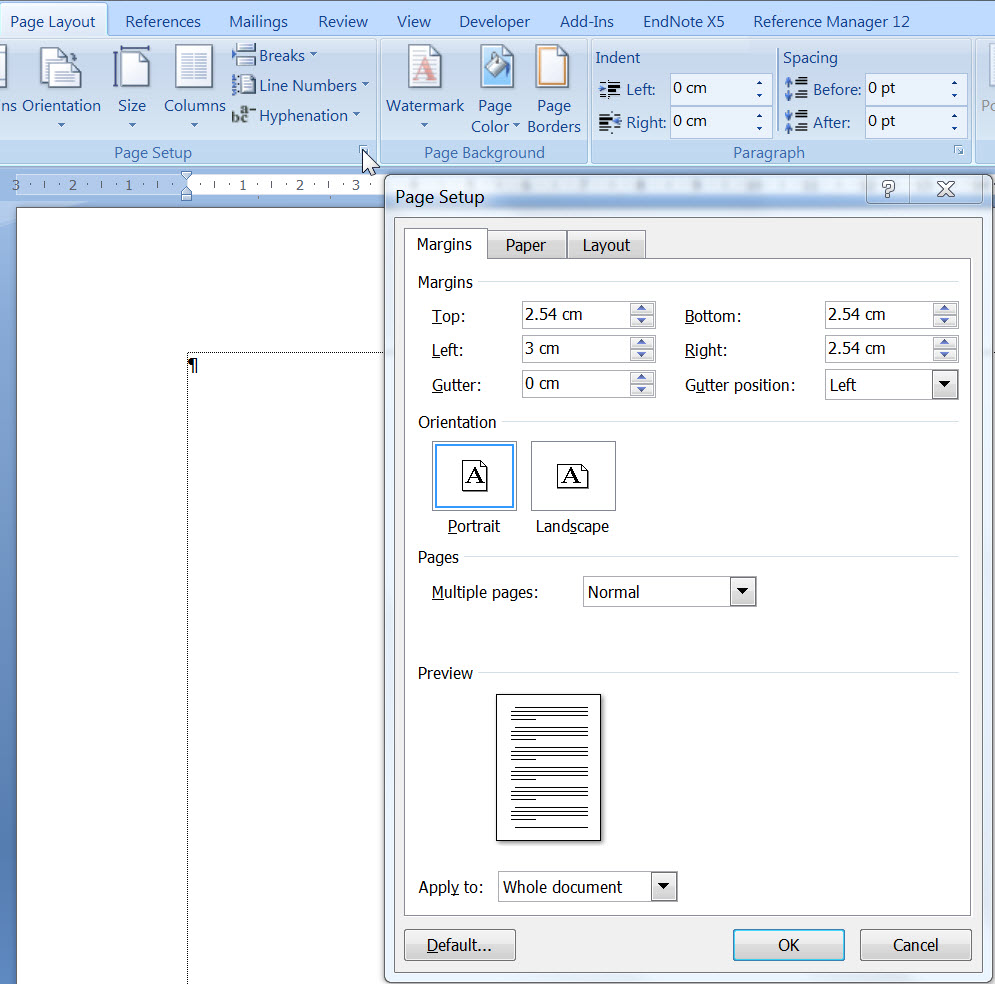
- click on the small icon in the left bottom corner of the Page Setup section of the ribbon to bring up the Page Setup dialog box
- click the Margins tab
- set the Left margin width to 3 cm
- select Portrait page orientation
- check that the Apply to drop-down box is set to Whole document and click OK.
These page margin and orientation settings will now apply to your whole document.
3. Specify the page layout
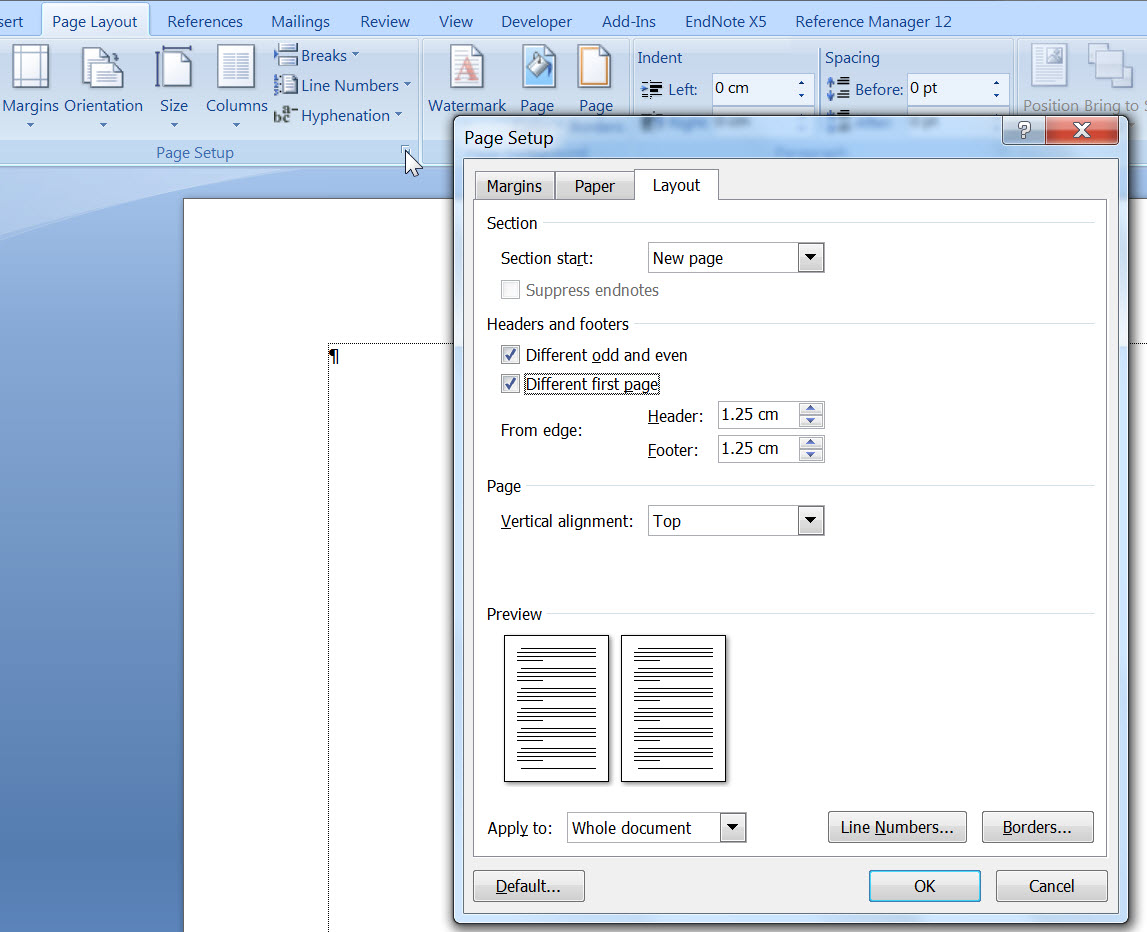
To set page margins and numbering for printing double-sided documents, select the Layout tab in the same Page Setup window as used in step 2:
- tick the Different odd and even option in the Headers and footers section
- tick the Different first page option
- make sure to check that the Apply to drop-down box is set to Whole document.
These page layout settings will now be applied throughout your whole document. They ensure that page numbering can be adjusted for odd and even
pages (step 7 explains why this is important) and that the inside margin will be wide enough to bind your printed document.
4. Modify the normal text font
If you are not happy with the fonts chosen for your document by Word, do not change these in the document text, but use the document styles list
to make changes. The styles list in a default new Word document will show only default built-in Microsoft styles.
To view the Styles list, select the Home ribbon and:
- click on the small icon in the bottom left corner of the Styles section of the ribbon
- in the Styles list that appears on the right, move the cursor over Normal style and click the down-arrow that appears
- click Modify on the drop-down list
- in the Modify Style window, set your preferred font and font size and click OK.

By changing the font and paragraph settings in the Normal style, you will never again have to adjust fonts in the text.
You only need to apply the Normal style to your text (see step 8 on how to apply a style).
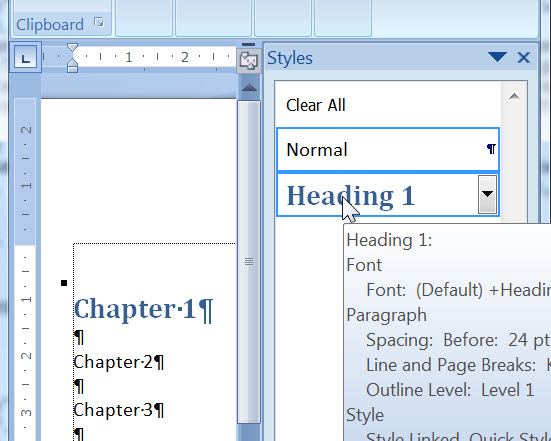
5. Create your custom headings
You can set the font and paragraph settings for headings in the same way as explained in step 4.
In the Styles list on the left:
- move the cursor over the Heading 1 style and click the down-arrow that appears
- click Modify on the drop-down list
- in the Modify Style window, set your preferred font and font size for the Heading 1 style and click OK.
To add more heading styles to the Styles list:
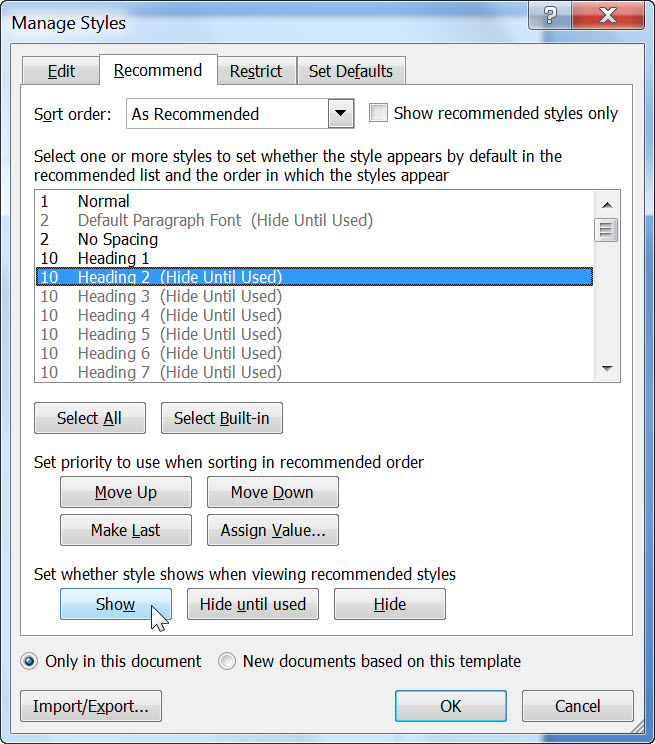
- click the Manage Styles icon
 at the bottom of the Styles window
 - select the Recommend tab
- click on Heading 2 in the list of styles
- click the Show button to make it appear in the Styles list.
Make changes to this style as explained above. You can also use this method to add other styles to the Styles list in your document.
See step 8 on how to apply these styles.
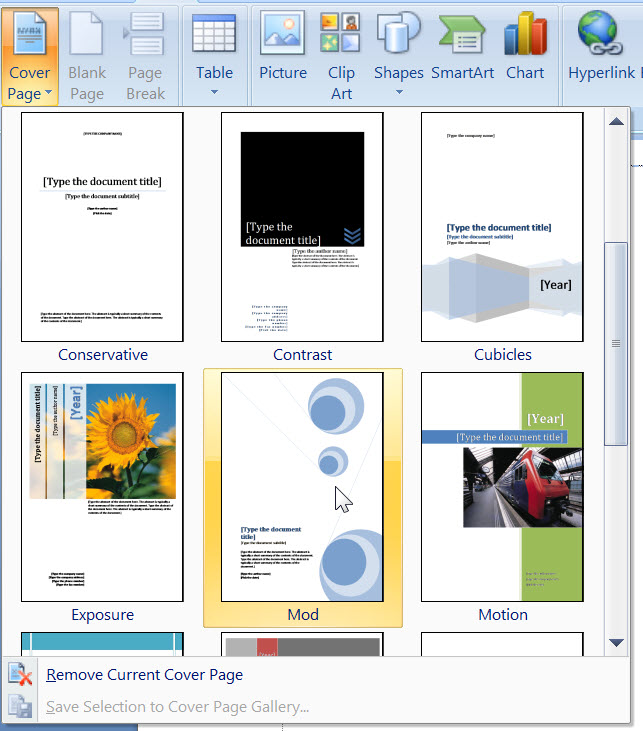
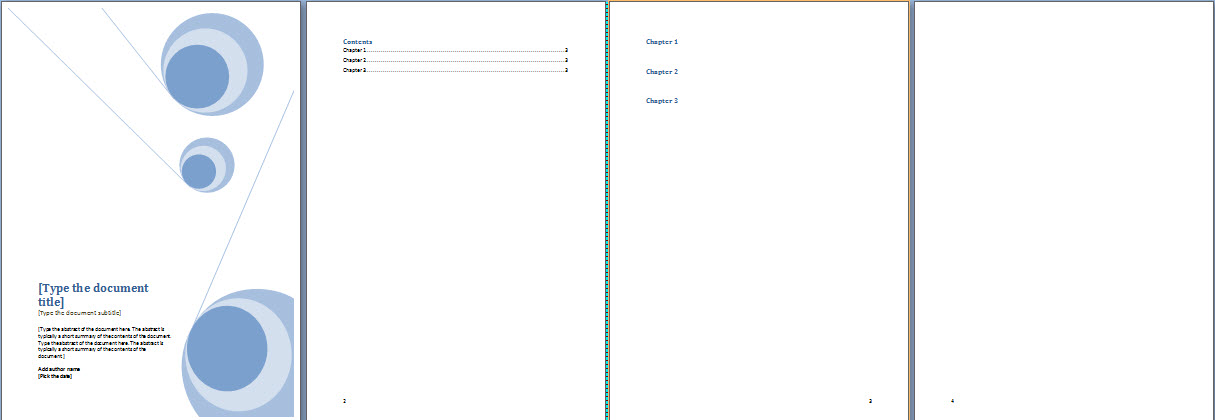
6. Add a cover page
Word 2007 provides several example cover pages you can add to your own document.
To choose a Word cover page for your document:
- place your cursor at the very beginning of your document
- select the Insert ribbon tab
- in the Pages section, click on the Cover Page button
- click on your preferred cover page in the examples list to insert this cover page into your document and click OK.
7. Add page numbers
In step 3, I specified that the document should have different odd and even headers and footers, and a different first page.
These settings now allow you to apply different formatting to the headers and footers of the first page (the cover), the odd pages and
the even pages. In a report intended for double-sided printing, for example, the cover page will not have a page number in the footer,
odd pages may have a page number in the bottom-right corner, while even pages may have a page number in the bottom-left corner.
The setting Different first page ensures that your cover page can be formatted independently from the other odd pages.
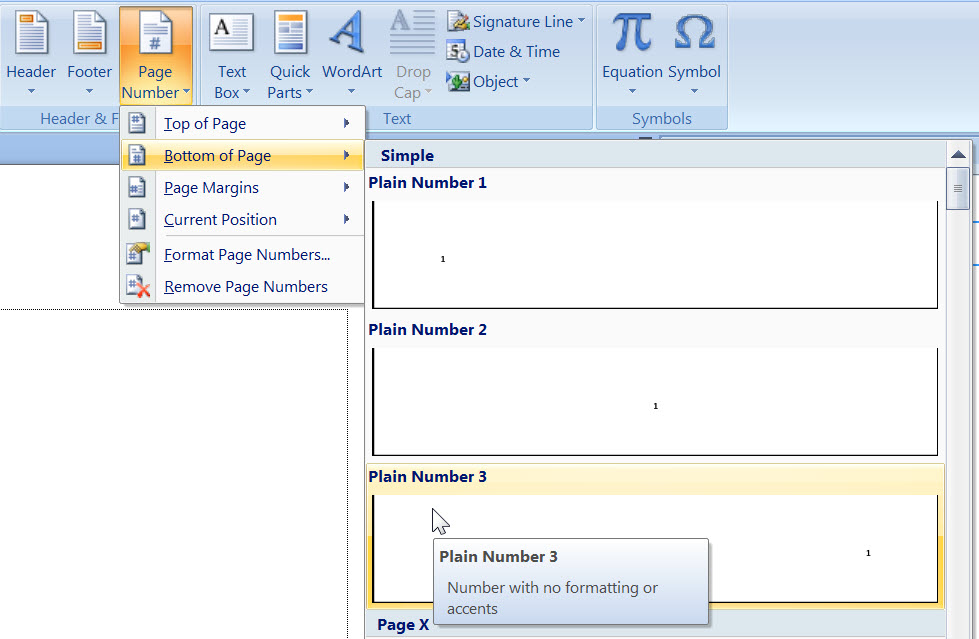
To add page numbers to the even page footers of the document, place the cursor on the next page after the cover page and:
- select the Insert ribbon tab
- in the Header & Footer section of the ribbon, click the down-arrow next to the Page Number button
- from the drop-down list, select Bottom of Page and then select option Plain Number 1.
This will open the footer region of your document and insert a page number field in the left bottom corner of the page.
To add page numbers to the odd page footers of the document, place the cursor on the next page of your document (add some empty paragraphs to
get there) and do the same for the odd page footers, only this time select Plain Number 3.
This will insert page numbers in the right bottom corner of odd pages.
By formatting page numbers like this, your whole document will have the same page numbering layout, no matter how long it will become.
8. Type in your main headings
Structure is important to write a clear and easy to understand document. Therefore, writing the main section headings before you write the content is a good strategy to build a sound structure from the start.
See also writing tips.
When you start writing in a Word document, the default style (ie Normal) will be applied to the text.
To format the main section headings, you need to apply the Heading 1 style created in step 5.
Place your cursor on the second line on the new page after the cover page and:
- type the text for each of your main headings on a new line, with a blank line in between
- place the cursor in the first heading
- in the style window on the right, click on the Heading 1 style to change the style of this paragraph to Heading 1
- repeat this for each main heading.
You have now applied the Heading 1 style to the main headings in your document and can start writing text in each section below it using Normal style.
9. Add a contents table to your document
Overview is as important for good writing as the structure itself. If you try to reflect the ‘story’ of your document in its structure and headings, you will deliver a much clearer document for your writers.
See also writing tips.
To keep an overview of your document headings handy while you write your document, insert a contents table in the document as soon as you create
the headings.
Word can automatically create a contents table if you apply its heading styles to your headings.
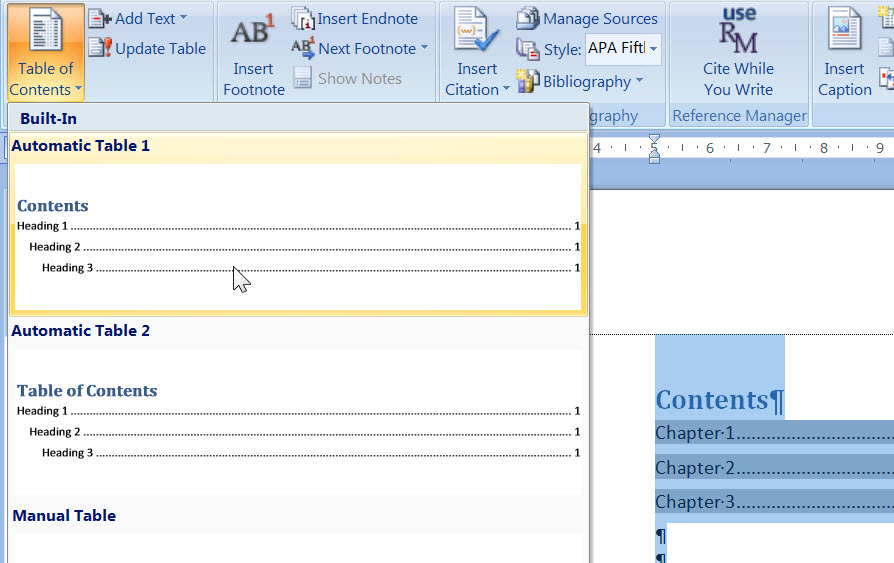
To insert a contents table:
- place the cursor after the cover page you inserted in step 6 and before the first Heading 1 in your document
- select the References tab on the ribbon
- click the Table of Contents icon
- select the built-in Automatic Table 1
- press Ctrl+Enter to place a page break after the contents table
Note: You need to have created at least one heading (as specified in step 8) to insert a contents table.
The table of contents will now be inserted and can display three levels of headings.
After you have added more sections and headings to your document, you can update the contents table automatically by inserting the cursor
anywhere inside the table of contents and pressing F9 on your keyboard. Word will automatically add all headings to which you have applied the
heading styles 1, 2 or 3.
10. Use Print Preview to view your document
If you have applied all 9 steps in this list, you will have a clean document layout for double-sided printing.
Check the Print Preview to see how your document will print:
- click the Office button in the top left corner
- select Print and Print Preview.
Continue writing your document from this point onward. If you need to modify the font, paragraph layout of text, or headings in your document, always make these changes in the styles. Adhering to these simple rules will save you lots of time and ensure your document will be print-ready at any stage of the writing process.
Your suggestions are welcome
These are my ten tips for formatting documents using MS Word 2007. Click on the link to download this Example Word file.
If you have any comments or questions, or would like to suggest further content, please use the comments below.
☙ ❧